New Stamper
WELCOME
NEW STAMPER!
Welcome to the amazing world of metal and hand stamping! And you found Font Fixation! YAY! There are lots of brands of stamps and stamping supplies in the metal stamping world, and you're probably wondering where to begin, what you need, and how to get started. We are hoping to take some of that mystery away and help you get started smoothly, and with as little stress as possible.
But let's be super frank real quick -- this is a NEW SKILL you're learning -- this means your level of investment and your quality of stamping will go hand-in-hand. Wait a sec, INVESTMENT?! Naw, I mean your TIME investment! While there will certainly be a cost associated with starting a new hobby or business, the most expensive part of this gig is the time you invest into becoming the best hand stamper you can be. You may look at other stampers and think, "I could never be that good," but stamping friend, let me tell you, YES, YOU CAN! It takes TIME and TIME and MORE TIME and practice to hone these skills. And if you have the time to invest in YOURSELF -- we have the tools to help you become amazing! READY?! LET'S GET STARTED TOGETHER!
SUPPLIES
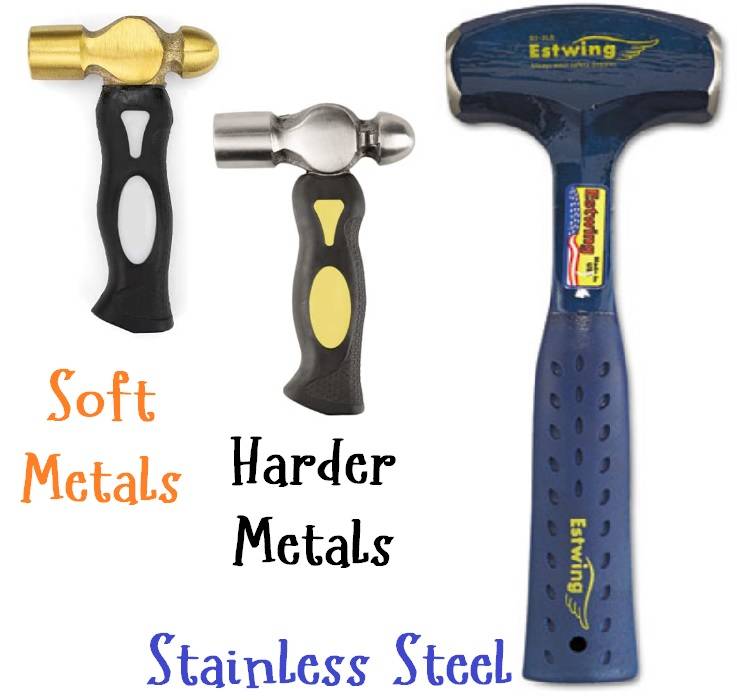
You need a Hammer
The left and middle hammers are called "Stubby" because they are short and have just enough room for your hand. Brass tops, like the one on the left, are PERFECT for soft metals like aluminum, pewter, and gold. Steel Stubbies are made from a harder metal and are perfect for copper and brass because their hammering head won't wear as quickly hitting harder metals. And finally, a 2lb mallet is best for super hard metals like stainless steel.
You are a beginner. You are going to do just fine starting with a soft metal, brass top, stubby hammer. You don't need anything stronger or more resilient at this time, because you're going to start with the most inexpensive and easiest to hammer metal: ALUMINUM.
As you get more experience and confidence in your new stamping craft, you'll want to expand your product line with other colors and metals, and when you do that you can choose to upgrade your hammer. The ONLY time you'd need a 2lb mallet like the one shown on the right is if/when you transition to stainless steel, and that won't be for some time. You'll read more about that later.
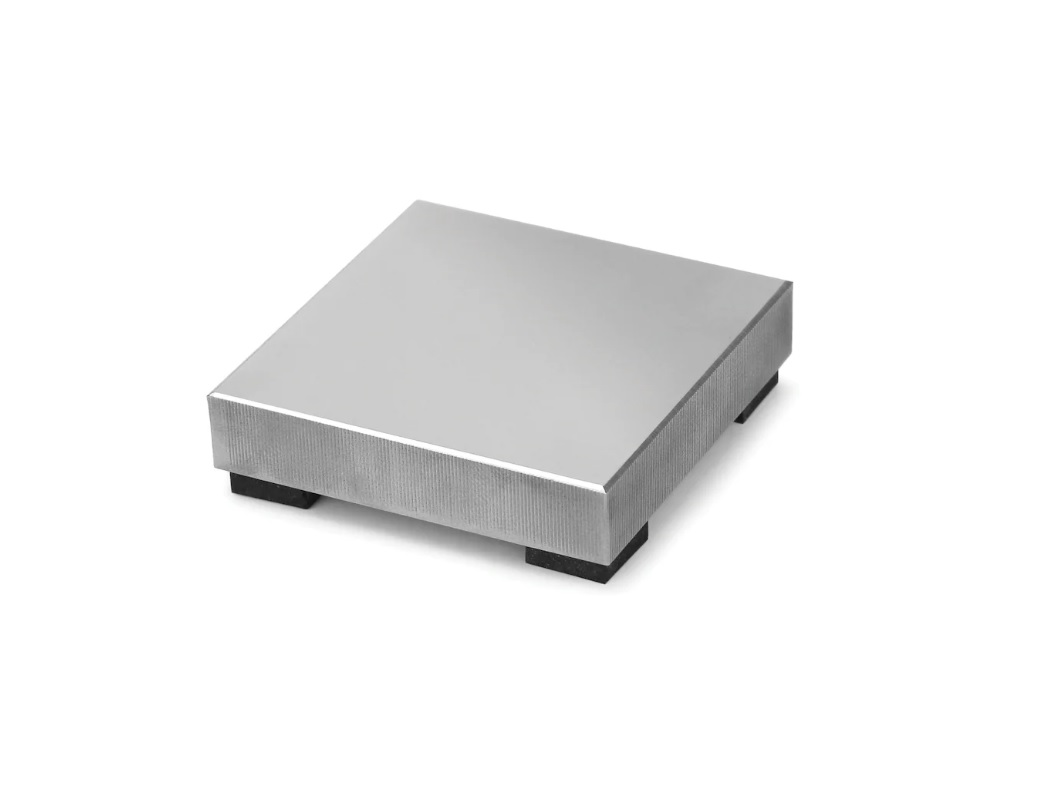
STAMPING BLOCK
Your local craft store will carry a 4" x 4" metal stamping block. It will look something like this image... Do they make 'em bigger? Yep! Do you need it now? Nope! Start small. Besides, you aren't sure yet if this is going to be your gig, right? So don't go spending a fortune on a tool that will last you just fine for many years.
Larger stamping blocks are great when you start mass producing -- which you may or may not decide to do! So keep it simple, keep it small, and go to your local craft shop for this little guy.
Metal
You are starting with ALUMINUM. Why? Because it's soft, affordable, and easy to get a great impression. But what size?
Here's a STAMPING PRO TIP:
Learn to understand inches and their conversion into millimeters.
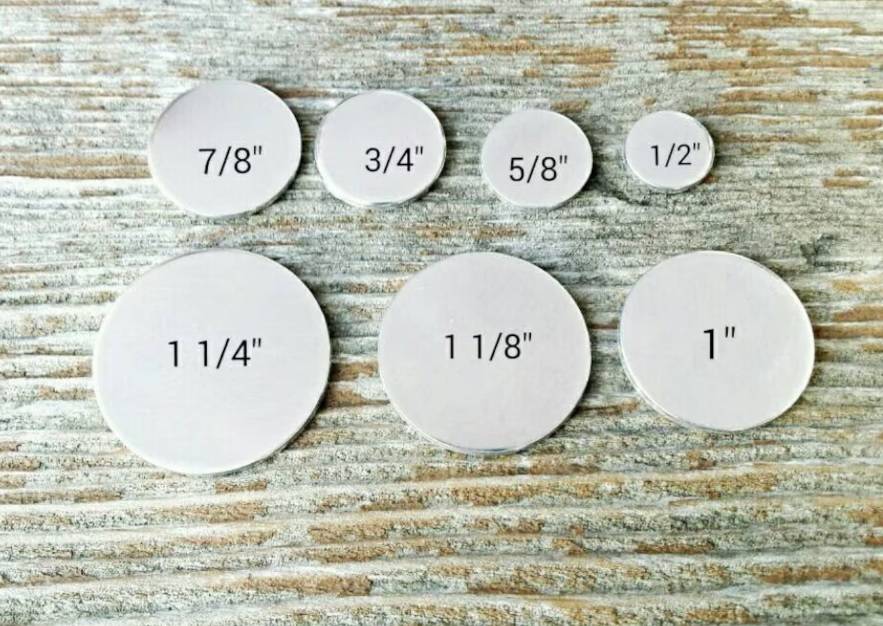
Blanks come in INCHES, as shown here by this photo from our friends at BirdsEyeBlanks. A 1/2" and 5/8" blank is perfect for tiny things like a monogram or single name... a delicate necklace or a bangle charm.
3/4" and 7/8" are great for a design and a word (or two, depending on the size font you're using).
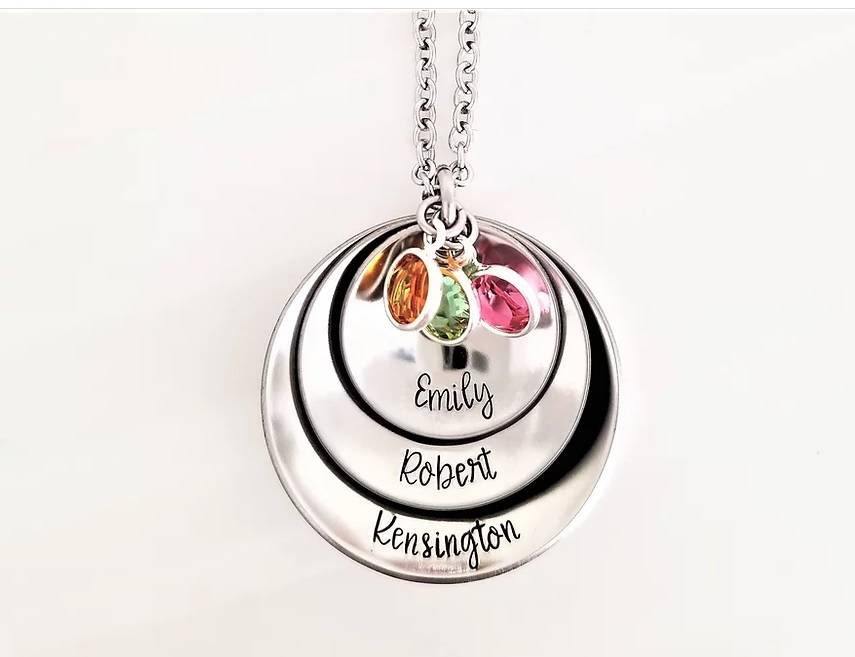
1" is great for a sentiment, which is a short sentence or a few words, and as you get larger, you're looking at jumping into keychains because they may be too big to wear as a necklace. You can choose to stack and layer larger size blanks with medium and smaller blanks, like the next photo shows! That's a great example of when a 1", 1 1/4", and a 1 1/2" blank work great as a necklace.
But I mentioned converting inches into millimeters... why? Because blanks are sold in inches, and fonts and designs are typically sold in millimeters.
Let's look at a quick conversion so you don't have to ask Alexa to do it (but she can!! Ask her any time!!):
1/4" = 6mm
1/2" = 12mm
1" = 25mm
A SOLID STAMPING SURFACE
OK, so let's be super clear about one thing.... The impression you get is almost 50% dependent on your stamping surface. And I mean that, so read it again! If you aren't getting a good impression, and you are hammering in a soft metal like aluminum, and you have the right hammer, you have one of two issues: you either aren't whacking the hammer hard enough, or you're stamping on the wrong surface.
I have a couple of videos on this topic on YouTube pertaining to stainless steel, but the best video and explanation is found using the button below. CLICK AND WATCH THAT VIDEO. It will explain PERFECTLY about force and the distribution of force based on the type of surface you're hammering on.
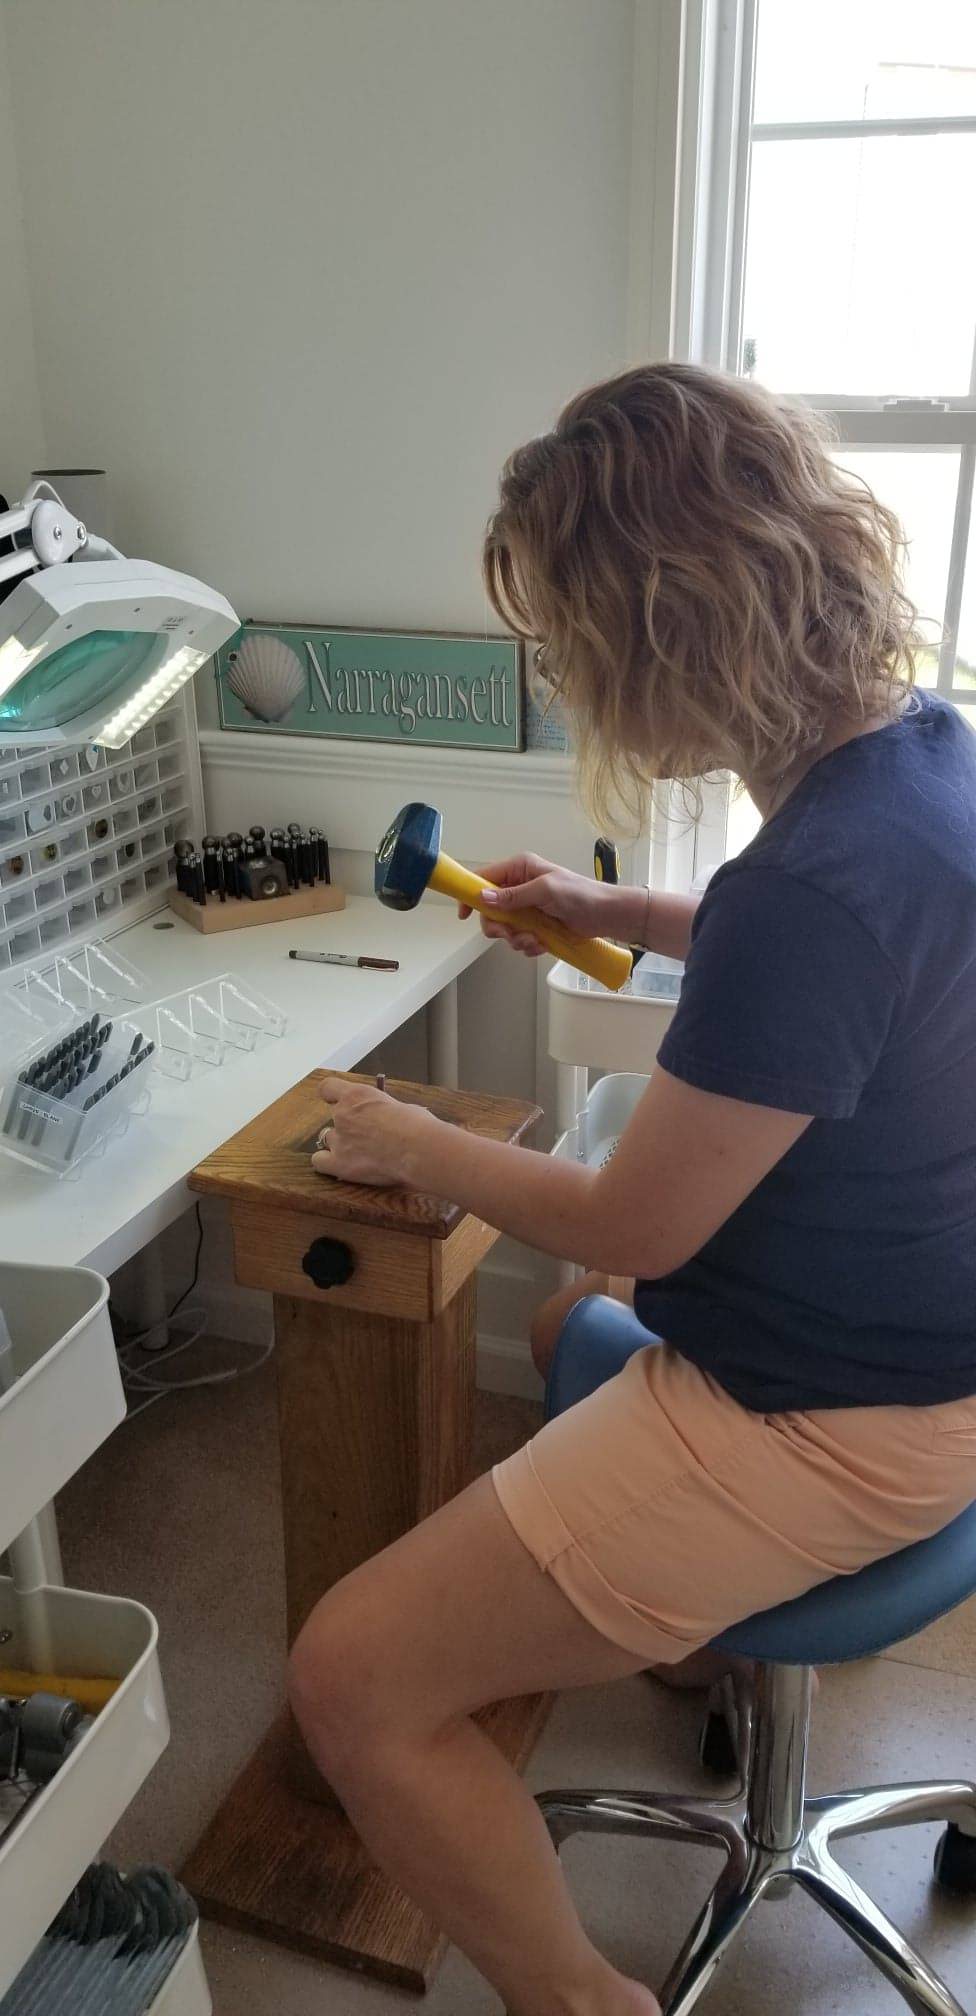
Now do you need to have a carpenter or handy friend make you a stamping post like the one shown here? NO! Get a solid stool that doesn't weeble-wobble, or completely flat stump of tree trunk, and put your stamping block right on that! Ideally you want to avoid using a table unless it's solid ANNNND you are hammering directly over the leg, which goes straight down to the floor.
Why? Click the button below this text box and watch the video. This will solve SO MUCH stress, you'll thank us!
But while we're checking out this picture and drooling over this stamping post, let's take a look at that white Ikea table in front of her. THAT is a PERFECT example of what NOT to hammer on. It's hollow, basically pressed carboard inside... and that means it will NOT take the impact of your hammer into metal. You'd also be hammering over a blank space under the table, which will not distribute that force of your hammer swing appropriately. That is the WORST place to hammer.
FONTS
Fonts... ahhh.... everyone has an opinion, am I right? Here are a couple of terms you should get familiar with:
1. UNICASE: this means that there is either ONLY set of alphabet, like ONLY UPPERCASE, and/or that all the letters are the SAME SIZE. "Uni" means "one", and "case" means, well, "size". So there may be a Unicase font with uppercase and lowercase letters, but ALL of the letters will be the same size, making there be no distinction in size between the uppercase A and the lowercase e for example.
2. STANDARD SETS: These are standard uppercase and lowercase sets, each with 26 letters, A-Z and a-z. They will be appropriately sized, or proportionally sized, as designed by the FOUNDRY (font maker).
And now that you know these terms, where should you begin? We have an excellent blog on that:
TOOLS, check!
Remember when we chatted earlier about learning how to ask Alexa to do some mathing conversions for you? Inches to millimeters, remember? Well now is when we level up how you think with another STAMPING PRO TIP: Learn to math the size of font and design you need based on spacing on the blank you want to use.
Say what? I know, it sounds like a foreign language, but let's play the imagination game -- where I ask you to think outside your box, and put on your "logical thinking cap" and play a game with me. Ready? Logical Thinking Cap in place? Let's begin.
Let's say I have a circular blank that's 1/4".
Mathing (or Alexa) tells me that is 6mm.
So at it's widest point, I have 6mm of space.
Now, let's do some like comparisons:
DESIGNS: these are the pretty picture/images that are one stamp of a THING -- not a font -- that you hammer into the metal to show a scene. For example, a heart, or a star. Every company will sell you metal stamps that are designs in a dozen sizes and shapes. Your goal is to think of the space you have, and how that determines the size design you need.
If I have 6mm, I can hammer ONE 5.5mm design and still have a little room for a hole at the top.
If I have 6mm, I can hammer TWO 2mm designs up/down, or vertically, from one another, with a little space between the designs, and a space for a hole at the top.
If I have 6mm, I can hammer ONE LETTER in a 5.5mm size font and still have a little space for a hole at the top.
If I have 6mm, I can hammer TWO ROWS in a 2mm font, with a a little space between the rows, and still have room at the top for a hole.
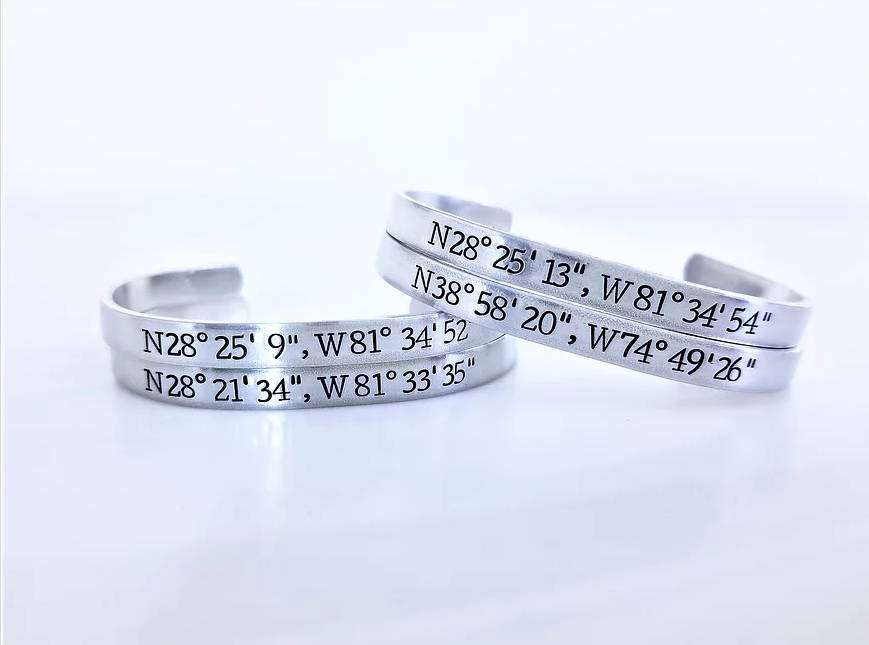
Let's look at the photo of the cuffs. Each of these cuffs are 1/4" wide. That means I have 6mm to hammer from the top of the cuff to the bottom of the cuff. I selected a font that was 4mm tall. That way, I had 1mm on top and 1mm on bottom and that made spacing on the middle of the blank super easy. To center your text on the blank, use a ruler to find the center of the blank, THEN, find the middle letter of your words when written on a piece of paper, and you'll be able to start hammering FROM THE CENTER OF THE BLANK to the left, and then to the right. This will ensure you're as close to the middle as possible. (Caveat: the number 1 and the letter i (uppercase and lowercase) are very narrow compared to an M or a w or an 8, so they will kind of mess with your centering. Keep that in mind... cheat one way or another a beat to compensate for wide and narrow letters and numbers!)
Are you starting to "see" where I'm headed with this? When you learn to BREAK DOWN THE BLANK INTO MILLIMETERS, you can start to envision what will fit on your blank. Try it with a 1/2"! What can you fit now?
What brand of stamps?
OK, well you're AT Font Fixation, so you either masterfully found us on Instagram, YouTube, or Facebook, orrrrr, you heard from a friend or another stamper that Font Fixation stamps (while a little pricey) are AHMAYZING. And they're right ((::dusts shoulders off::))! But WHY are Font Fixation stamps so great? The taper of the stamps (so you can see EXACTLY where you're stamping), the price point, and the durability (all of our stamps are rated for stainless steel)... not to mention, we back our products for one year when you purchase from us and we offer lifetime care and management of your stamps should you find yourself living on a boat, or taken by a flood.
THIS is the BEGINNING of SOMETHING EXCITING, New Stamper!! And we are SO thankful and thrilled you found us and have chosen us to start your new metal stamping journey with you. So are you ready to do this together? We are RIGHT THERE BESIDE YOU!!
You bring the stamps and the snacks, and we'll bring the hand holding and knowledge! Now, put your hair back and let's get stamping!